
One of this blog’s most visited entries (ranking always around the Top 5 Google results for “HTTP POST” too) elaborated on how to send data across to a server from a J2ME Midlet.
I thought it was high time for bringing this into the new Century, and provide an update as to how to do this from an Android smartphone.
It turns out that (a) the code is relatively straightforward and (b) that there is not so much difference after all from writing the same code for a desktop client: credit for this ought to go to the Android Google team who have done such a superb job of adapting the J2SE API to the Android platform.
As usual, I will not elaborate on the basics of how to set-up your Android development environment (I strongly recommend the excellent tutorials on Android.com) or about the basics of an HTTP POST (please refer to the original article).
Also, whilst not explicitly noted in the code below, it should be obvious that this may be a long-running request and/or anything could go wrong and block, and you should never run a network action from within the UI thread, as it would otherwise make your application unresponsive (this is even more critical in Android, where the system wisely detects such cases of kiddie-programming and pops a request to the user to the effect that they may want to terminate the offending slouching app… yet another reason to love the Android platform!): more details can be found in this post, which is still very much up-to-date.
Given that the code to send an HTTP POST request requires some data to be sent in the first place, and so as to make it all a bit more interesting, I decided to add a twist to the tale, by providing an example of how you could use Protocol Buffers in you communication between your mobile app and the server back-end.
Protocol Buffers are a massively useful technology developed (and open-sourced) by Google and we use them all over the place both as data payloads for our RPC infrastructure, as well as ways to encapsulate our domain model objects in our Bigtable persistence store (very often, PB’s are the model objects and are used as first class objects).
Elaborating on their usefulness is outside the scope of this post, and I would strongly encourage you to experiment with them, especially if your application needs advanced serialization capabilities and/or is based on (or would benefit from) mixed-language (Java / C++) code.
Please download the source code from here, and then use the source code to build a protobuf-2.4.x.jar library that you will need to add to both the Android and Server projects (note this warning when adding the JAR to the Android’d build path: do not add it as a User Library in Eclipse, but rather as a single “external” JAR, or it won’t be added to the APK and the application will fail at runtime).
If you are using Eclipse for your development (and I can’t honestly see why not) it’s worth noting that my team just released a new protobuf editor that is freely available and it will eventually released as open-source; it is based on the awesome XText 2.0 framework for DSL development, go check it out (the latter only works for Eclipse 3.7).

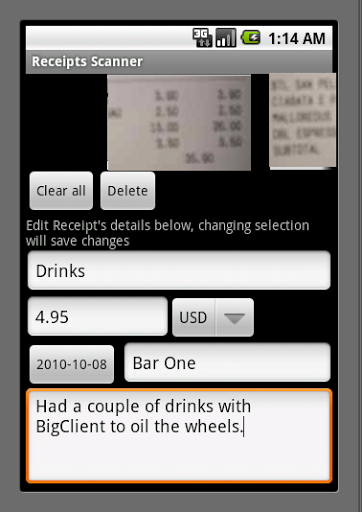
The following code is based on my Android Receipts applications (you can install it from Android Market – the current version does not implement the server communication yet, but sends the receipts’ images and data to your email account).
Alright, having done intros and niceties, here we go!
As the starting point, here is the code for the protobuf messages:
// receipts.proto   created 2011-08-10, M. Massenzio

// Copyright AlertAvert.com (c) 2011.  All rights reserved.


package receipts;

option java_package = "com.alertavert.receiptscan.model.proto";

option java_outer_classname = "ReceiptsProtos";


message ReceiptProto {

  // The unique ID associated with the receipt,

  // may be left unassigned until persisted

  optional string id = 99;


  // A name associated with this receipt, it should be unique for the user

  required string name = 1;


  required string merchant = 2;

  required float amount = 3;


  // The currency for the amount, if not present assumed to be

  // the default for the locale

  optional string currency = 4;

  optional string notes = 5;


  // The scanned image of the receipt, may not be there

  // (as its URI may be retrieved from the persistence layer).

  optional bytes image = 6;

}


/*

 * A server request payload, contains enough information to

 * uniquely associate the request with

 * an ongoing user session and one or more receipts.

 */

message ReceiptsPayload {

  required string token = 1;

  repeated ReceiptProto receipts = 2;

  optional string username = 3;

}
Fairly straightforward as you can see, this will compile to both C++ (.h / .cc) and Java source code, which one can then use in one’s own code – the serialization is implemented by the protoc libraries (you’ll see an example below) and the framework takes care of all the rest.
The command line to compile this is:
protoc --cpp_out=../src-gen/cpp --java_out=../src-gen/java receipts.proto
assuming that your code is in the receipts.proto file.
I use normally a Makefile to automate all this, which looks something like this:
# Makefile for protobufs

#

# Created by M. Massenzio, 2011-04-16

# Updated 2011-08-10

#

# Assumes the following structure (works best with Eclipse):

#

# Project

#   src           --> contains all java packages

#   src-gen/java  --> contains generated Java files in their packages

#   src-gen/cpp   --> contains generated C++ files in their namespaces

#   proto         --> all source .proto files

#

# In general, Protocol Buffer libraries are expected to be found

# in /usr/local/lib (see also below).


all: build


clean:

	@echo "Removing all generated code and recreating directories"

	@rm -rf ../src-gen/*

	@mkdir -p ../src-gen/cpp

	@mkdir -p ../src-gen/java


# WARNING: ../src-gen/cpp and ../src-gen/java-gen MUST be already present,
#          use make clean

build: receipts.proto

    # fails if protobuf is not installed

	@pkg-config --cflags protobuf >/dev/null

	@protoc --cpp_out=../src-gen/cpp --java_out=../src-gen/java receipts.proto

	@echo "Code successfully generated.\nRemember to include these flags in the compilation:\n" `pkg-config --cflags --libs protobuf`


#

# Flags for the compilation:

# compiler: -pthread -I/usr/local/include

# linker:   -pthread -L/usr/local/lib -lprotobuf -lz

#

# In Eclipse, use Project > Properties > C/C++ Build > Settings

#

# C++ Compiler: Miscellaneous --> add -pthread in "Other flags"

#               Directories   --> add a 'workspace linked' /gen directory

# Linker: Libraries  (-l) protobuf (-L) /usr/local/lib

#         Miscellaneous --> Linker flags: -pthread

#

# For Java projects, remember to add protobuf-java-2.4.0a.jar

# (on this system, under /opt/google/protobuf-2.4.0a/java/target)

#
If all went according to plan, you should have, in src-gen/java/com/alertavert/receiptscan/model/proto a ReceiptsProtos.java file, which you can open to have a look at (I strongly discourage editing it – nothing good can come of it, and it will be overwritten anyway once one regenerates the protobufs).
Time to go back to the Android project, add the protobuf-2.4.x.jar to the build path, add src-gen/java to the build path as a source folder (if src-gen is not already part of the project’s folder, add it as a “linked folder,” then right-click on the ‘java’ folder and select Build path > Add as source folder).
Verify that Eclipse can build the project without syntax errors on the ReceiptsProtos.java class, and then create (or update) an existing class that will send the receipts objects to the server.
Mine looks something like this:
// Copyright AlertAvert.com (c) 2011.  All rights reserved.

// Created by M. Massenzio

package com.alertavert.android.applications.receipts.connectivity;


// imports omitted

// ...


public class HttpSender implements Sender {

  /** Use a custom user-agent to distinguish the sender and for logging purposes */

  private static final String USERAGENT =

      "AndroidReceipts-server-alertavert_1.0.0;android/receipts";

  URL destination;

  private String reason;


  @Override

  public boolean send(Collection receipts) {

    if (receipts.isEmpty()) {

      return false;

    }

    BufferedOutputStream os = null;

    HttpURLConnection connection = null;

    try {

      connection = (HttpURLConnection) destination.openConnection();

      if (connection == null) {

        reason = "Could connect to server " + destination;

        return false;

      }

      // Uses POST

      connection.setDoOutput(true);

      // get the default chunk length

      connection.setChunkedStreamingMode(0);

      // set a custom user agent, so the server can choose the best way

      // to handle the request

      connection.setRequestProperty("User-Agent", USERAGENT);

      os = new BufferedOutputStream(connection.getOutputStream());

      byte[] data = wrapIntoProtoPayload(receipts).toByteArray();

      Log.d(ControllerActivity.TAG, "Proto serialized into "

          + data.length + " bytes");

      os.write(data);

      if (connection.getResponseCode() == HttpURLConnection.HTTP_OK) {

        // TODO notify the listener of a successful send

        Log.d(ControllerActivity.TAG, "Receipts successfully uploaded");

        return true;

      } else {

        // TODO call the listener and return the error code and message

        Log.e(ControllerActivity.TAG, "Error uploading receipts: " +

            connection.getResponseMessage());

        reason = connection.getResponseMessage();

        return false;

      }

      return true;

    } catch (IOException ex) {

      ex.printStackTrace();

      return false;

    } finally {

      try {

        if (os != null) os.close();

        if (connection != null) connection.disconnect();

      } catch (IOException stupidestExceptionEver) {

        // just ignore this idiocy and praise JDK7's Try-With-Resources

        // ... not one day too soon!

      }

    }

  }


  private ReceiptsProtos.ReceiptsPayload wrapIntoProtoPayload(

      Collection receipts)

      throws IOException {

    ReceiptsProtos.ReceiptsPayload.Builder builder =

       ReceiptsProtos.ReceiptsPayload.newBuilder();

    // TODO obtain these values from the SessionManager or a SecAuth layer

    builder.setToken("123456abcdef");

    builder.setUsername("anuser");

    for (Receipt r : receipts) {

      builder.addReceipts(wrapIntoReceiptProto(r));

      Log.d(ControllerActivity.TAG, "Adding receipt " + r.getName());

    }

    return builder.build();

  }


  private ReceiptProto wrapIntoReceiptProto(Receipt r) throws IOException {

    ReceiptProto.Builder builder = ReceiptProto.newBuilder();

    if (r.getId() != 0) {

      builder.setId("" + r.getId());

    }

    builder.setName(r.getName());

    builder.setAmount(r.getAmount().getFloatValue());

    if (r.getAmount().getCurrency().length() == 0) {

      // TODO(marco) extract the default currency for the locale

    } else {

      builder.setCurrency(r.getAmount().getCurrency());

    }

    builder.setMerchant(r.getMerchant());

    if (r.getNotes().length() > 0 ) {

      builder.setNotes(r.getNotes());

    }

    // Extract the image data and wrap into the protocol buffer

    byte[] buf = new byte[1024];

    InputStream is = new BufferedInputStream(new FileInputStream(

        r.getImageUri().getPath()));

    ByteArrayOutputStream bos = new ByteArrayOutputStream();

    int numBytesRead;

    while ((numBytesRead = is.read(buf)) != -1) {

      bos.write(buf, 0, numBytesRead);

    }

    is.close();

    ByteString image = ByteString.copyFrom(bos.toByteArray());

    builder.setImage(image);

    return builder.build();

  }

  ////////////////////////

  // Lots of other stuff here omitted, in particular Listeners that will be

  // notified when this method completes, etc.

  // ...

}
As you can see, the core of sending an HTTP POST request is pretty straightforward: 5-6 lines of code at most, with all the rest necessary to wrap the data around (note that in the sample code above I do virtually no error checking on the returned response code, nor use any data that the server may be sending back – maybe in a later post…).
The all-important line is
connection = (HttpURLConnection) destination.openConnection();
with destination the URL of the server (something like: https://receipts.alertavert.com/Receipts/upload); when testing it from your Android device, you have essentially two options:
- emulator – slow and painful, I discourage it;
- a real Android device connected via USB to your development box (highly recommended).
Depending on which option you use, and if #2 is being use with WiFi active (and possibly connected to your internal A/P) you will have to use different URLs. Assuming that your server (more about that in a second) is running on the same box as your development environment, and that you use either the emulator or the phone with WiFi OFF, use 10.0.2.2 as the address to get to your machine.
If you are using a device, with WiFi on, you can just use the PC’s IP internal address (say, 192.168.0.3, or whatever it is you have set it up at on your LAN – or even an externally facing IP if your router/LAN allows you to do so).
Remember that if you are running a plain vanilla Tomcat instance, that one will be listening on port 8080, so the full URL will be something like:
http://10.0.2.2:8080/ReceiptsServer/upload
Which brings us finally to the server-side code, a pretty run-of-the-mill Servlet class:
public class UploadServlet extends HttpServlet {

  private static final long serialVersionUID = 1L;

  private static final Logger log = Logger.getLogger(UploadServlet.class.getCanonicalName());

  private static final String JPEG = ".jpg";

  private static final String FILE_SCHEME = "file";


  /**

   * @see HttpServlet#doPost(HttpServletRequest request, HttpServletResponse

   *      response)

   */

  protected void doPost(HttpServletRequest request, HttpServletResponse response)

      throws ServletException, IOException {

    ByteArrayOutputStream bos = new ByteArrayOutputStream();

    BufferedInputStream bis = new BufferedInputStream(request.getInputStream());

    try {

      int numBytesRead;

      byte[] buf = new byte[256];

      while ((numBytesRead = bis.read(buf)) != -1) {

        bos.write(buf, 0, numBytesRead);

      }

      log.info("Received " + bos.size() + " bytes");

      ReceiptsProtos.ReceiptsPayload payload = ReceiptsProtos.ReceiptsPayload

          .parseFrom(bos.toByteArray());

      if (payload != null) {

        // TODO(marco): validate token with a SessionManager

        log.info("Got a valid payload: " + payload.getToken() + ", with "

            + payload.getReceiptsCount() + " receipts enclosed, from user "

            + payload.getUsername());

        if (payload.getReceiptsCount() > 0) {

          List receipts = new ArrayList();

          for (ReceiptsProtos.ReceiptProto proto : payload.getReceiptsList()) {

            // simple proto -> object model adapter method

            Receipt receipt = protoReceiptAdapter(proto);

            // extract the image data, save to a file and set receipt.setImageUri()

            // to point to it

            extractImage(proto.getImage(), receipt);

            log.info("Received a receipt: " + receipt.toString());

            receipts.add(receipt);

          }

          // TODO pass receipts to a DAO for persistence

        } else {

          log.severe("No receipts received");

        }

      } else {

        log.severe("Could not parse payload into a valid ReceiptsProto object");

      }

    } finally {

      bos.close();

      bis.close();

    }

  }


  /**

   * A simple implementation of an Adapter, this would most likely be

   * delegated off-servlet too.

   *

   * @param proto

   * @return

   */

  private Receipt protoReceiptAdapter(ReceiptsProtos.ReceiptProto proto) {

    Receipt receipt = new Receipt();

    receipt.setName(proto.getName());

    receipt.setMerchant(proto.getMerchant());

    int intVal = (int) Math.floor(proto.getAmount());

    int decVal = (int) (proto.getAmount() - intVal);

    receipt.setAmount(new Money(intVal, decVal, proto.getCurrency()));

    receipt.setNotes(proto.getNotes());

    return receipt;

  }


  /**

   * Saves the image data to a temporary file - obviously this is just for demonstration

   * purposes, the actual persistence would be delegated elsewhere,

   * away from servlet processing.

   *

   * @param image

   * @param receipt

   * @throws IOException

   */

  private void extractImage(ByteString image, Receipt receipt) throws IOException {

    File imageFile = File.createTempFile(receipt.getName(), JPEG);

    BufferedOutputStream bos = new BufferedOutputStream(new FileOutputStream(imageFile));

    bos.write(image.toByteArray());

    bos.close();

    try {

      receipt.setImageUri(new URI(FILE_SCHEME, imageFile.getAbsolutePath(), ""));

      log.info("Image file saved in " + imageFile.getAbsolutePath());

    } catch (URISyntaxException e) {

      log.severe("Could not create URI for " + imageFile.getAbsolutePath()

          + ", original error was "

          + e.getLocalizedMessage());

    }

  }

}
Again, there is virtually no error processing here, nor any error codes are returned to the client – definitely not production-class, but at least gives you an idea of how to get data from a mobile Android client and save it someplace server-side.

Remember to add to your web.xml the following:
<servlet>

    <description></description>

    <display-name>UploadServlet</display-name>

    <servlet-name>UploadServlet</servlet-name>

    <servlet-class>

        com.alertavert.receipts.server.servlets.UploadServlet

    </servlet-class>

  </servlet>

  <servlet-mapping>

    <servlet-name>UploadServlet</servlet-name>

    <url-pattern>/upload</url-pattern>

  </servlet-mapping>
so that it knows how to direct the request.
Hope this becomes as popular as the other, please feel free to link to this page from your blog and / or forum posts (I’d love to hear from you if you do so, but you don’t need any special permission) and let me know what you think of it.
(Images courtesy of E. Massenzio (c) 2011 – see her other work here)


Leave a comment